Monday, July 21, 2014

Moist Pumpkin Pound Cake and Thoughts

I know it's not Fall, but I just had to share this recipe with you. It's easy, delicious and inexpensive.

Pound cake. The food of champions. Or maybe it's just me. 


Nah... if it was just me, you wouldn't be here to drool over this cake. That's logic.


A very dear family friend is coming to visit, so I wanted to make something special for them. I had pumpkin I needed to use, so I figured I'd make a pound cake. The ingredients are pantry staples (at least for this blogger), so I was able to make it on the spot. Nifty, eh?


Anyway, I am the namesake of the company we're having (to make it easier from here on out, I'll call her Grandma Lilah). We have been very close since the day we met. I was only a baby then, but you know how it goes. 


Since she's coming over, I want the food to be perfect. She is an amazing home cook. Like, A-freakin-MAZING. So, she deserves the best. And I think this Pumpkin Pound Cake is just that.


On with the baking, shall we?


I began this batter much like any other cake batter: combining sugars, eggs and butter until creamed together.


Then, in a separate bowl, combine the dry ingredients and blend together with a fork.


After it's all creamed together, add your pumpkin and blend. It will look mealy/inconsistent, but that's okay. The graininess is how it's supposed to be.

Next, alternate between mixing in dry ingredients and the buttermilk/vanilla mixture.


Dry...


Make sure to mix until it's just combined. As I mentioned in my Banana Bread recipe, over-mixing will develop the gluten and your cake will be tougher. We want tender and delicious.
Want tough stuff? Go to boot camp.

Wet ingredients...


And combine...


Repeat the process until you've combined all of the ingredients.

Then, without snitching too much of the batter, scrape it into your VERY well greased Bundt pan. I used Crisco, because it seems to work the best for me. 

Bake the cake; once you take it out, let it cool in the pan for about 10-15 minutes. Then remove it from the pan to finish cooling. 


Once cooled, cut what will be the bottom of the cake so it is flat. I used a large serrated knife.


Of course, you eat the bits that are cut off... because, why waste?
Gently flip it back over onto your serving plate. Don't break it or you'll have to eat it all and make another before company comes...

That actually doesn't sound like a punishment. Hmm...


This would be really yummy with a maple glaze or lightly sweetened whipped cream. Whatever turns your crank!

Please enjoy a slice with someone you love. Make sure to come back and tell me what you thought!

Ingredients:
1 15-oz can pumpkin
¾ cup sugar
¾ cup packed dark brown sugar
½ cup butter, softened
4 eggs, room temperature
1 tsp. vanilla extract
3 cups all-purpose flour
1 ½ tsp. pumpkin pie spice
1 tsp. baking powder
½ tsp. baking soda
½ tsp. salt
¾ cup buttermilk

Oven @ 350F and grease your Bundt pan WELL. No need to flour.
Cream butter, eggs, sugar and brown sugar. If you don't have dark brown sugar, do what I did: add a bit of molasses to light brown sugar. Simple!
Add in pumpkin and combine. It'll look grainy. No biggie. 
Add in alternating dry ingredients and buttermilk/vanilla mixture. 
Don't have buttermilk? No problem! Take one cup of milk and add one tablespoon of lemon juice. Let sit at room temp for 10-15 minutes. Voila! Add the curd and everything (don't separate them) when you measure out the 3/4 cup for the batter. 
Once everything is combined, dump it evenly into your greased Bundt pan. 
Stick it in the oven for 45 minutes and check. If it isn't finished, like mine, add another 10 minutes.
Let it cool in the pan when it's finished for about 15 minutes. Take it out (mine popped right out) and let it cool completely. Take a long serrated knife and with long, gently movements, saw off the very top (what will be the bottom) so it sits flat.
Turn it back onto your serving dish. Serve with a maple or cream cheese glaze or even some whipped cream. Whatever suits your fancy.


Remember: No matter where you are, keep it homemade.

Monday, July 14, 2014

Probably the Best Banana Bread, Like, Ever!

So, I'm pretty sure I have the most awesome and delicious recipe for banana bread. Yeah, you read me right. 

It's moist.
It's delicious.
It's incredible.

Need I say more? Didn't think so. But I will!

I have a lot of fond memories when it comes to homemade banana bread. Especially when it's warm, moist in the center and just lightly crunchy on top.

I like a little butter all melted in when it's fresh out of the oven. Talk about YUM! Great breakfast stuff here, guys.


See? Just look at it... just take a moment and look at it with me...


Moist and tender in the center.


Crunchy and golden brown on top.

I know, I know, you're dying for the recipe. Being a kind host, I will oblige. 
I doubled the batch because I love banana bread. These two loaves didn't last longer than 48 hours. For real, guys, it's that good... hence the lack of pictures. I'll have to update next time I make it. 

I'm a slacker. This is a thing I know.


Here's what you need for ONE loaf of Banana Bread:
1 3/4 cup of flour
1 1/4 tsp baking powder
3/4 tsp salt
1/2 tsp baking soda
3/4 cup of sugar
1/3 cup butter
2 large eggs
2 tbsp milk
Splash of vanilla... I pretty much never measure vanilla. My bad.
3 ripe bananas (the best flavor comes from the ones that are perfectly freckly and sweet smelling)

Preheat the oven to 350F.

Mix together your dry ingredients and your wet ingredients in separate bowls. Combine them with a rubber spatula. Don't over-mix your ingredients. Mixing too much will develop the gluten in the flour and your bread will not have a tender crumb. It'll be tougher and a bit drier in consistency. Science.

Thoroughly grease a 9x5 bread pan with Crisco (or whatever vegetable shortening you have on hand). Fill the pan with the batter and make sure to wipe any drips from the sides. It'll be easier to clean off when it's time for dishes. 

I hate dishes, so I try to make it as easy on myself as possible. And for all of you, of course.

Anyway, bake your bread for 60 minutes. Check after that amount of time and do a toothpick test for doneness. Mine took an extra 10-15 minutes to get golden brown on top and a completely clean toothpick. Ovens vary, people, so be careful. 

You don't want a funeral for your bread... what would you bury bread in? A basket? Anyway...

I removed the bread from the pan just about as soon as I was able. I let them sit on a cutting board under a tea towel until they cooled enough to slice. I'm not sure what it is, but for some reason the bread gets a really nice consistency when you let it sit under a towel after it comes out of the oven. Science? Meh. More like an "I've-done-it-this-way-every-time-and-it-always-turns-out-great" kind of thing.

Don't forget to reward yourself with a thick slice of banana bread just the way you like. I had mine with a bit of butter and (as always) a comfy spot and a book. How do you like yours?


Remember: No matter where you are, keep it homemade. 

Tuesday, July 8, 2014

Go Green! Go Whales!

Whales! My favorite marine mammal since I was approximately 22.67 seconds old. They're ginormous, loving creatures and I can't get enough of them.

So, as you can imagine, I was totally psyched to do a kids' reading project for Julie Fogliano's awesome children's book, "If You Want to See a Whale".

A little background for ya: I work at the local library and do story time for the kids in the morning. I pick a book, read it and make a craft/activity. It's totally great.


I LOVE this book for so many reasons. The big ones are:
1. Language- The artistry Fogliano uses in her prose is stunning. I'm a grown woman, but the words she uses give me delightful chills of both awe and inspiration.
2. Illustrations- The pictures are incredible. I spent the better part of a half hour just looking at every detail in the illustrations of this book. So lovely. *sigh*

Anyway, enough swooning. On to the craft!

The kids loved this one and, I must say, I really enjoyed it as well! For this craft, you will need:
1. Exacto knife or scalpel (something very sharp for little cuts; mind those fingers!)
2. Scissors
3. Molded-fiber egg carton(s); one (dozen size) carton makes 8 whales
4. Blue or gray acrylic paint; paint brush
5. Permanent marker and/or googly eyes
6. Elmer's glue (if you opt for the googly eyes)
7. Empty toilet paper tubes

I started out trimming down the egg carton. Remove the lid and the little flap to close on the side. You should end up with just the little cups attached together.

Like this:

Pretty easy, eh? Next step!

Make cuts for the tail on the second cup for each side and follow the curve of the cup around. These were pretty easy with the Exacto knife. It should resemble something like this:


Aren't they looking cute already?! Sorry, I just can't contain myself. The entire time I was making these, I was squealing like a little kid with a new puppy... or an adult with a new puppy. Puppies are great.

Anyway, back to the task at hand!

In the half cups you have left, cut another set of tails and follow the curves into two more whales. Like this:


I found that cutting the outlines of the tails on either side of the cup was much easier for the finishing cuts than removing one and grappling with the other. But, you're your own person and you'll do as you please. Just thought I'd be helpful so you can avoid front page of the Pinterest fail blogs. ;)


Next! Trim off the elongated and irregular bits (I called them stilettos) from your whale bellies with scissors. Sometimes there are bits that bump out or go up a bit too far to cut off. That's okay. Whales aren't perfect. It's part of their charm. Plus, I guarantee the kids won't mind, they'll be too excited about the activity!

Totally forgot to take pictures of this step. Mah bad. You forgive me though, right?
Of course you do! Because I'm giving you this AWESOME idea to enrich your children's lives!

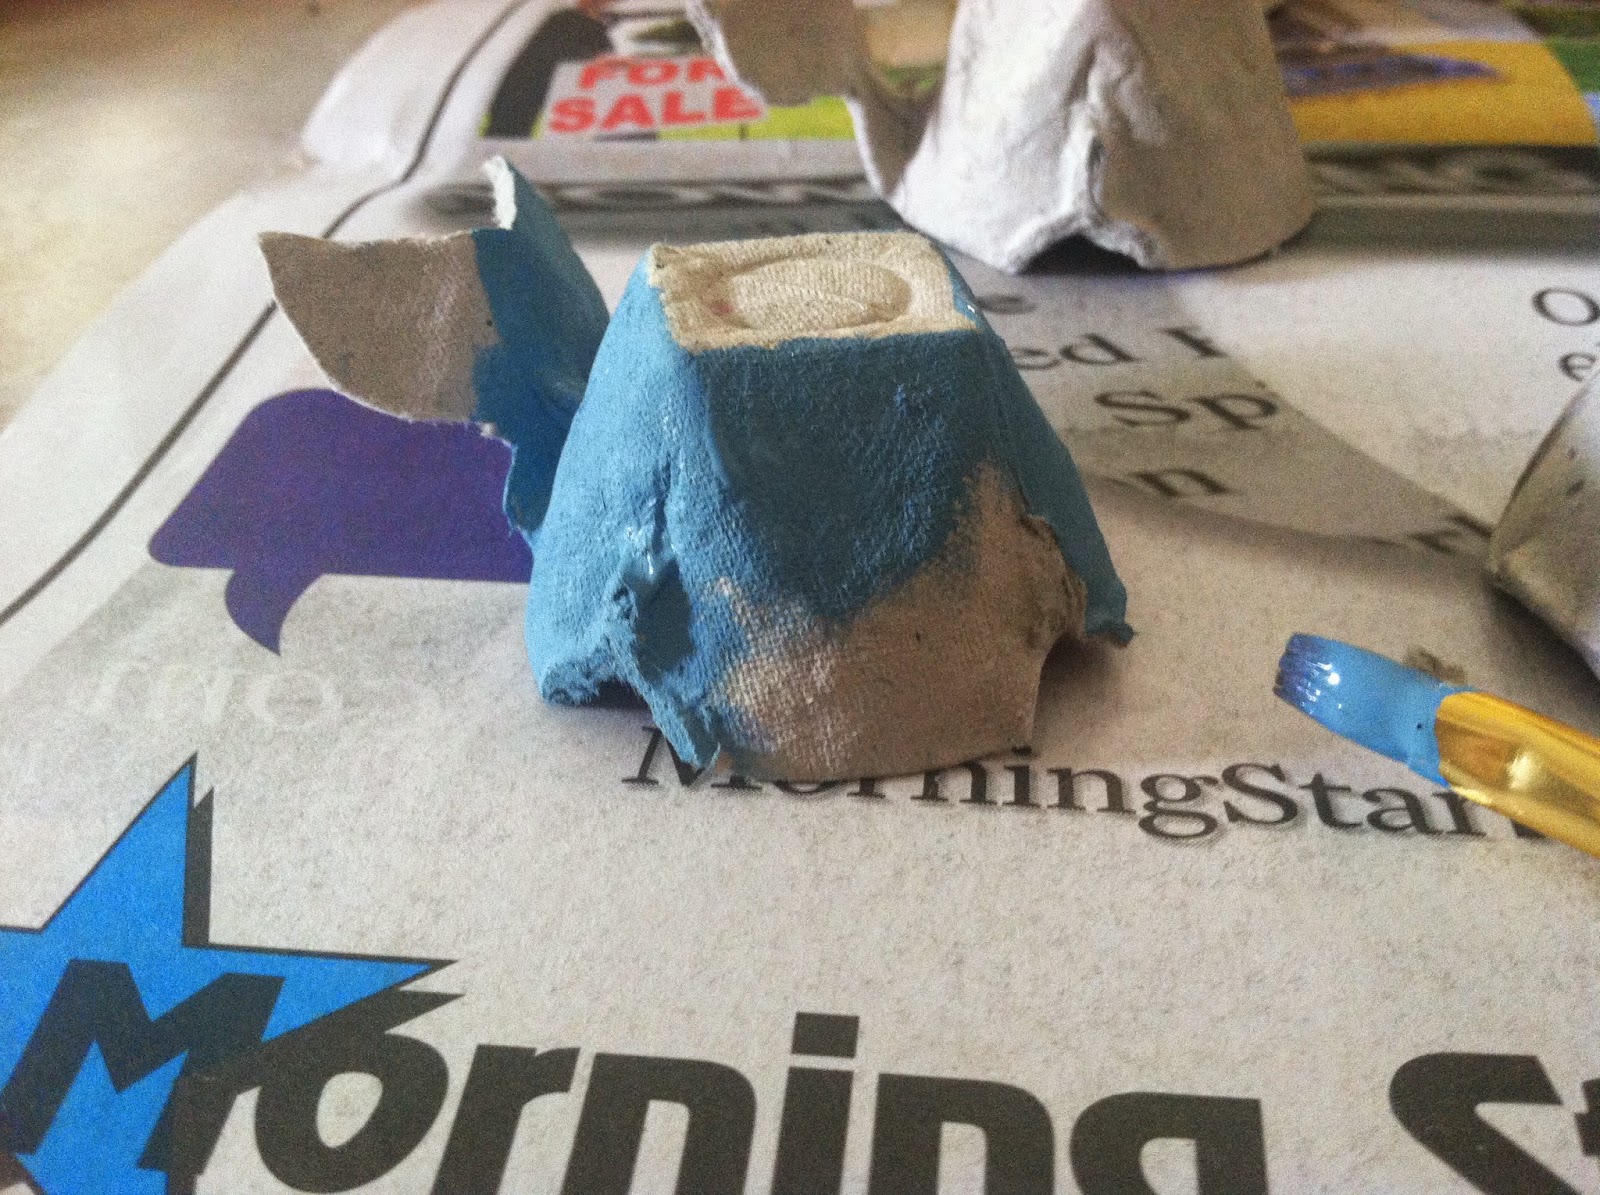
Now it's time to paint. Woohoo! Summon your inner Michelangelo, guys. I used only a small bottle of acrylic paint (actually, I used a mixture of blue and grey). A little goes a long way with these little cuties.


Aren't they sweet?! I just love 'em!


Once they're all painted, let them dry for a few minutes. Since the material is fibrous, this doesn't take long. Next: decide whether you want googly eyes or to draw them on. For the sake of this project, I glued them on with a little bit of Elmer's. Easy peasy, folks!


Aren't they great? For the activity with the kids, I hid these little guys around the library and had them decorate toilet paper tubes for their own spyglasses. They had a great time seeing how many they could find.

At the end, I let them take one home; they were thrilled. You could adapt this idea for lots of different whale-themed books or activities. It's easy, green and frugal: a few of my favorite things. ;)


Remember: No matter where you go, keep it homemade.

Wednesday, December 18, 2013

Greetings and Crock Pot Apple Butter!

Hello and welcome to Michigan, Homemade. I believe in local produce, saving money, supporting local business and blooming where you're planted. I welcome you to read about life in the heart of Michigan, where I plant, cook, bake and create a place for me and my husband, Matthew.

For my first post, I thought I would share my first (solo) experience cooking and canning apple butter. In case you didn't know, Michigan had a stellar apple crop this year (2013). As much as last year's crops suffered due to the weather and an untimely frost, it was a blessing in disguise! The energy the precious apple trees had been creating to turn those gorgeous apple blossoms into fruits was stored when the buds died. That meant that this year's crop got a huge boost from that stored energy and, therefore, an awesome harvest of around 30 million bushels! *Go Apples!*


So, to begin, I picked apples from my mother's friend's apple tree. The apples are a Macintosh x Jonathan (sometimes called Jonamac) hybrid. After picking totes and 5-gallon buckets FULL of apples, we trucked back home and stored them in the basement until we could process them. I should have taken more pictures-- lesson learned! When I finally got time (between work, classes and everything else), I cut the bad spots and quartered the apples. Make sure to make the rest of the process a little easier on yourself and cut around the core. Yeah, yeah, it takes more time, but it's much easier later on!


Once the apples were prepared, I loaded about half of them into my mom's huge soup pot and added apple juice (until there was about 1/2"-1" of juice at the bottom of the pot). The juice (you could also substitute water if your apples are sweeter) is to help keep your apples from scorching or getting stuck to the bottom. I had my pot at medium heat.


MAKE SURE TO STIR, STIR, STIR!!


Don't load too many apples into your pot, because you'll need to be able to stir them to keep from scorching. As your apples cook down and get soft, you can add more apples and continue stirring until they are all soft and warm and delicious-smelling. Once they're at this point, you can use a food mill to remove the skin and any hard bits of core that may have been missed in the cutting process (hey, it happens!).


Place your food mill over a large bowl and spoon in the apples a couple scoops at a time. Turn your mill and make sure to clean off the blade by turning the opposite way every few turns. Continue this process until you have all your apples through the mill. You will have a bowl of what looks like applesauce.


Add seasonings until you have your desired apple butter taste. However, remember that seasonings will bloom with heat and sometimes get STRONGER after they've been in your slow cooker! In order of quantity, I added:


Cinnamon

Allspice
Nutmeg

You can also add ginger and clove, but I don't care for those flavors, so I left them out. You can use a combination of any of these spices, depending on your taste preference.


TASTE, TASTE, TASTE!


Make sure to taste the "applesauce" BEFORE you put it in the crock pot. Make sure that it isn't too sweet/tangy/etc. for your taste. If it's too tart, add some brown sugar (not granulated/white sugar). The molasses helps sweeten and round out the flavor from really tart apples.


Looks good; tastes great; must be ready!


I LOVE the deep, rich brown color of apple butter, which can be easily achieved by using your handy, dandy crock pot! Empty the contents of your bowl into your crock and put it on low. Leave the lid off, because the goal is to cook out the water in the apples until you get a thick, dark, DELICIOUS result. Depending on your crock pot, it can take up to 12 hours on low to cook down to the color and a thick consistency (as shown).


Before you can the apple butter, taste it and do any necessary finishing touches. If you can't can the apple butter right away, it's safe to leave it in the crock and put it in the fridge. However, MAKE SURE TO HEAT THE APPLE BUTTER BACK UP BEFORE YOU CAN IT!


To can, I did an open water bath, leaving 1/4" headspace and using a hot pack method. Easy peasy!


Well, that's all for now. I hope you all enjoyed this post and tune in for more in the future!


Remember: no matter where you are, keep it homemade.